Updated By Vinyl Frog On February 21, 2025
Post Heating Vinyl Wrap

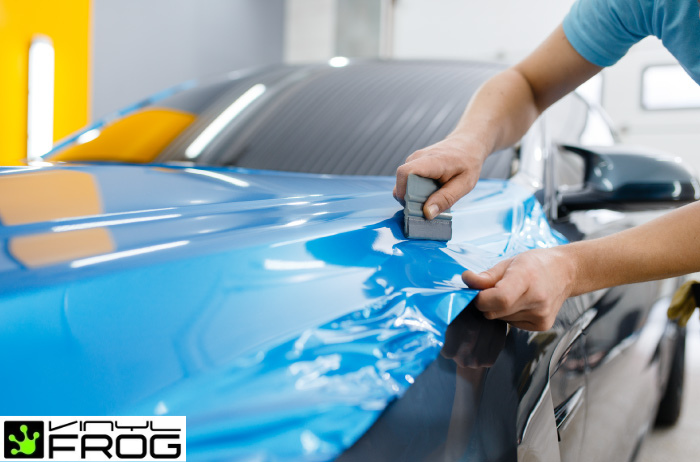
Wrapping your prized vehicle with a supreme quality vinyl is not an easy task. Once you have accomplished it, you have to make sure that the vinyl will serve you well hence the process of post heating is highly imperative. Here’s all you should know about applying heat to your wrap after the process.
What Is Post Heating?
Post heating is a procedure that involves applying heat to the vinyl wrap in all places where it has been stretched out to fit such as, on channels, grooves and recesses. Every car has a different body. If it is complex with a lot of curves, the vinyl has to be stretched to fit like a glove, as if it is the second skin.

Post-heating helps the adhesive to flow in a form and maintain a bond. This is how it wraps over areas where we might see lifting and popping. It is said to be the final step when the wrapping is done or the graphics have been put. When the installation has been done, a heat gun is used to complete the process focusing on all the edges and trims.
Using heat when vinyl is applied is the key to a successful wrapping job. The right amount of heat will help fulfill the look otherwise an overstretched vinyl will eventually return to its original shape.
What Tools Are Needed For Post Heating?
If you are planning to post-heat your car with vinyl wrap then you would need a heating gun and an IR thermometer to properly measure the temperature needed for a complete post-heating process. The IR thermometer will make sure the vinyl reaches the proper temperature. There is a certain temperature required for proper post heating which is between 95° to 120°C for calendared films.

Post Heating Vinyl Wrap On Cars
It is highly important to post heat after wrapping a car. This is also the final step. You will have to apply the vinyl wrap properly in all the areas, recesses, and channels. Make sure that the vinyl has been placed accurately and that there are no pockets of air or creases which will affect the film.
While heating, move your heat gun over an 8 to 10 inches wide area until it reaches the desired temperature. Make sure you miss no spot. Keep moving the heat gun. If you focus it on one spot, the vinyl might burn.
Once an area has reached a minimum temperature of 95°C, move along to the next part. The process of post heating is not very time consuming and it prevents the vinyl from lifting from certain areas. Ensure reaching the minimum temperature prescribed for post heating otherwise your vinyl will not set properly. This happens mostly in the areas where there is a lot of stretch and tension in the film.
Once all the areas are done, heat the trimmed edges and the parts where the vinyl is overlapping. Now is the time for final inspection. See if there are any imperfections where work needs to be done. If not, you have successfully wrapped your vehicle. Now let it stay for the next twenty-four hours to allow the adhesive to settle and the film to adhere perfectly.

What Areas Need Post Heating?
Check out the areas where the film is prone to lifting like channels, doors, handle

Steps To Post Heating Vinyl Wrap
This process takes place after the film has been applied and stretched properly on the surface of the vehicle.
- First, you will need a heat gun and an IR thermometer to correctly measure the temperature needed for post-heating.
- Place the vinyl nicely on the recesses and channels.
- Check all the areas properly for any air pockets and remove them.
- If you see the film lifting when the temperature rises, it means there is air beneath the surface.
- Once you have applied the film, heat a small area of around 8 to 10 inches.
- Keep on moving your heat gun around the area in a gliding motion back and forth. Do not point it in one place.
- Measure the temperature using a thermometer to see when it reaches the required degree.
- Check all the areas, especially the small ones. Then apply the same procedure to the edges and areas where the film overlaps.
- Once all is done, make sure there are no imperfections left.
- Leave your vehicle to remain in your garage or parking lot for 24 hours to adhere properly.
If we do not post heat vinyl wrap on vehicles properly, it will go back to its original shape or flatten back within a short time. Most of the time the wrap curls from the bumpers or mirrors because it is not post heated properly. It should be done correctly as post-heating enhances the longevity of the vinyl wrap. So make sure to do it all over the vehicle especially where the film is stretched. It might take time but the slower the better.
Tips And Tricks
- Do not overheat the vinyl as this will damage it.
- Make sure you have checked the manufacturer's instructions before post-heating.
- There are different types of vinyl, and every vinyl has its heating capacity. You must know how much to heat each vinyl.
This is a technical process which needs proper procedure as it triggers a chemical reaction that responds to heat.
Frequently Asked Questions
Conclusion
Post heating is important for successful vinyl application. Last but not least, remember the temperature and the use of the right tools are the most important factors in the whole process. Be careful when heating the vinyl, too much heat might ruin it. Always use a heat gun for the whole procedure. Post-heating is the final and last step so make sure it's done nicely as it can ruin or make the vehicle look fab!


